The 60 mph Shimmy: A Minilite Owner’s Step-by-Step Vibration Hunt
Photo: Kevin Lyons, CC BY-SA 3.0, via Wikimedia Commons
There’s a particular kind of groan that goes with a classic-car steering shake. It usually arrives just as you’re settling into a motorway cruise, somewhere between 55 and 70 mph, and it turns a relaxed run into a white-knuckle guessing game. On a Minilite-shod car, the temptation is to blame the wheels immediately. They’re alloy, they’re old, they’ve probably been refurbished at some point — so it must be them, right?
Not necessarily. A Minilite is a simple bit of kit, but it sits in a system: tyre, rim, hub face, spigot, studs, bearings, bushes and steering joints. The shake is just the symptom. The job is to work out which part of that system is talking to you before you spend money on the wrong cure.
Start with when it happens, not what it looks like
Before you jack the car up, make a note of the conditions. Does the vibration come through the steering wheel, the seat, or the whole floor? Is it worse under braking, or only when you’re holding a steady speed? Does it disappear above 75 mph, or does it keep going? Does it change when you swap front and rear wheels?
A steering-wheel shake that appears in a narrow speed band and fades again is classic front-wheel imbalance or runout. A shake you feel through the seat is more likely to be rear-wheel related. A vibration that worsens under braking points towards a warped disc, a sticking caliper or a wheel that isn’t seating squarely. None of these are automatically Minilite faults, but all of them can feel like one.
Also check the simple stuff first: tyre pressures, tyre condition and whether the car has been sitting. A classic that’s been idle for weeks can develop flat spots in its tyres, and those thumps can mimic a wheel-balance problem for the first few miles. If the shake settles after ten minutes of driving, don’t ignore that clue.
The free checks before the tyre bay
Give yourself half an hour and a decent torch. Chock the car, jack it safely and support it on stands. Then work through the basics.
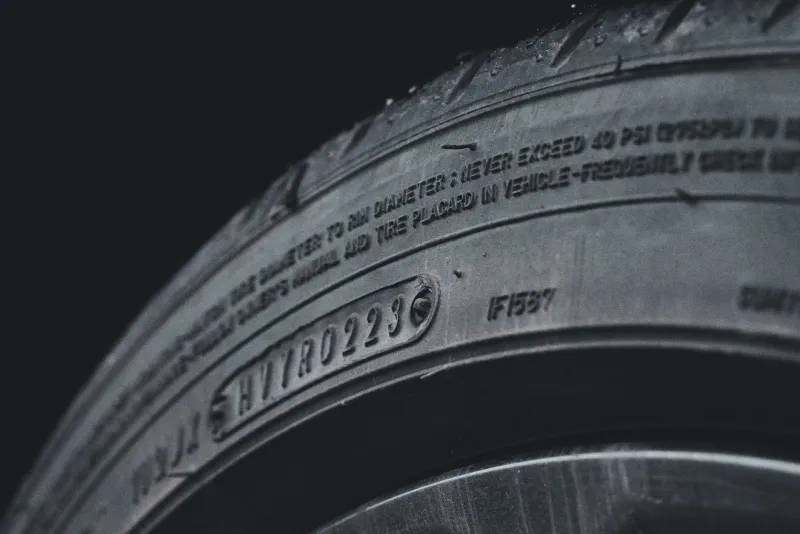
Look at each tyre for uneven wear, bulges, cracking and embedded debris. Check the dates on the sidewalls — old rubber can balance perfectly and still vibrate. Run your hand around the tread and feel for cupping or scalloping.
Next, inspect the wheel faces and the hub faces. This is where a lot of repeat tyre-bay visits begin. A tiny bit of corrosion, paint overspray or road grime between the Minilite and the hub stops the wheel sitting flat. It can be enough to create a wobble that no amount of balancing will fix. Clean both surfaces properly, check the spigot ring is present and seated if your conversion uses one, and make sure the wheel nuts or studs are clean and torqued correctly.
Have a look at the stick-on weights too. They should be firmly attached, not hanging off the edge of the rim, and not fouling the brake caliper or suspension. If a weight has gone missing, the wheel is out of balance — but the reason it fell off may be poor surface preparation at the last tyre bay.
Why Minilites need balancing with a bit of thought
Alloy wheels aren’t automatically harder to balance than steel, but they do need the right method. Many tyre machines centre the wheel on its bore using a cone. If the wheel is lug-centric — located by the studs rather than the centre hole — that can introduce a small error. A good tyre bay will use a lug-centric adapter or, on pin-drive Minilites, the correct pin-drive mounting. Ask them how they’re mounting the wheel. If the answer is vague, go somewhere else.
A road-force balancer is useful on a classic because it can detect stiffness variations in the tyre as well as simple imbalance. It isn’t essential, but it’s a sensible step if you’ve already had the wheels balanced twice and the shake persists.
Runout is the check most owners skip
If balancing doesn’t cure it, check runout. With the car safely supported, spin each wheel and watch the rim edge against a fixed pointer. A small amount of lateral or radial movement is normal; a visible wobble is not. You can use a dial gauge if you have one, or a zip tie clamped to the suspension as a makeshift pointer.
If the runout follows the wheel when you rotate it to a different stud position, the wheel or tyre is the likely culprit. If it stays in the same place on the hub, look at the hub face, brake disc, bearing or stub axle. That distinction saves a lot of guesswork.
Don’t forget the car underneath
Worn bushes, tired track-rod ends, ball joints, steering-rack play and wheel bearings can all produce a 60 mph shimmy. They’re not automatically the cause just because the car is old, but they need checking. With the car on stands, use a pry bar carefully to check for movement in the suspension and steering joints. Spin the wheel and listen for bearing rumble. Check the brake discs for scoring and pad deposits.
A worn bush won’t usually create a pure wheel-balance-style shake on its own, but it can amplify one. Fixing the wheel and ignoring a knackered track-rod end is a false economy.
A sensible order of attack
Work in this order: tyre pressures and condition; clean hub and wheel faces; check spigot rings and fastener torque; inspect and re-torque wheel nuts; swap front and rear wheels to see if the shake moves; get the wheels balanced by a place that understands alloy wheels; check runout; then inspect bushes, bearings and brakes.
Keep notes. If the shake changes after a wheel swap, you’ve narrowed it down. If it stays exactly the same, you’ve ruled something out. That’s progress, even if it doesn’t feel like it.
And if you find a cracked rim, a dented bead seat or serious corrosion around the stud holes, stop driving on it. A Minilite is tough, but it isn’t immortal. Diagnose first, spend second — your classic will thank you for it.